DeFi Staking: Launch of Shiba Inu (SHIB) pools
With the launch of Shiba Inu (SHIB) staking pools, Earn Network is excited to offer users seamless earning services. Check out the quick step-by-step guide to start staking through our easy-to-follow process.

Introducing the latest offering from Earn Network: Shiba Inu (SHIB) staking pools. Our innovative staking solutions strike the perfect balance between security and accessibility, catering to both seasoned investors and beginners, allowing you to achieve your financial goals effectively.
One of the key features of our DeFi staking solution is the flexibility it offers. You now have the freedom to choose between locked and flexible options based on your unique investment strategy. Locked pools provide higher yields and longer staking periods, making them an ideal choice for those who are committed to long-term investments. On the other hand, flexible pools offer agility and do not require any staking periods, allowing users to adapt their investment approach as needed.
At Earn Network, we prioritize the decentralization of our platform and strive to provide a user-friendly interface, ensuring the safety and security of your investments. You can confidently stake your funds and take your investment journey to new heights by following our comprehensive, step-by-step staking guide specifically designed for SHIB tokens.
How to start staking Shiba Inu (SHIB)?
Now, we will walk you through the simple process of interactions with Shiba Inu DeFi Staking pools so you can easily stake your tokens and earn yield in a decentralized manner.
1. Go to the Shiba Inu Offers page.
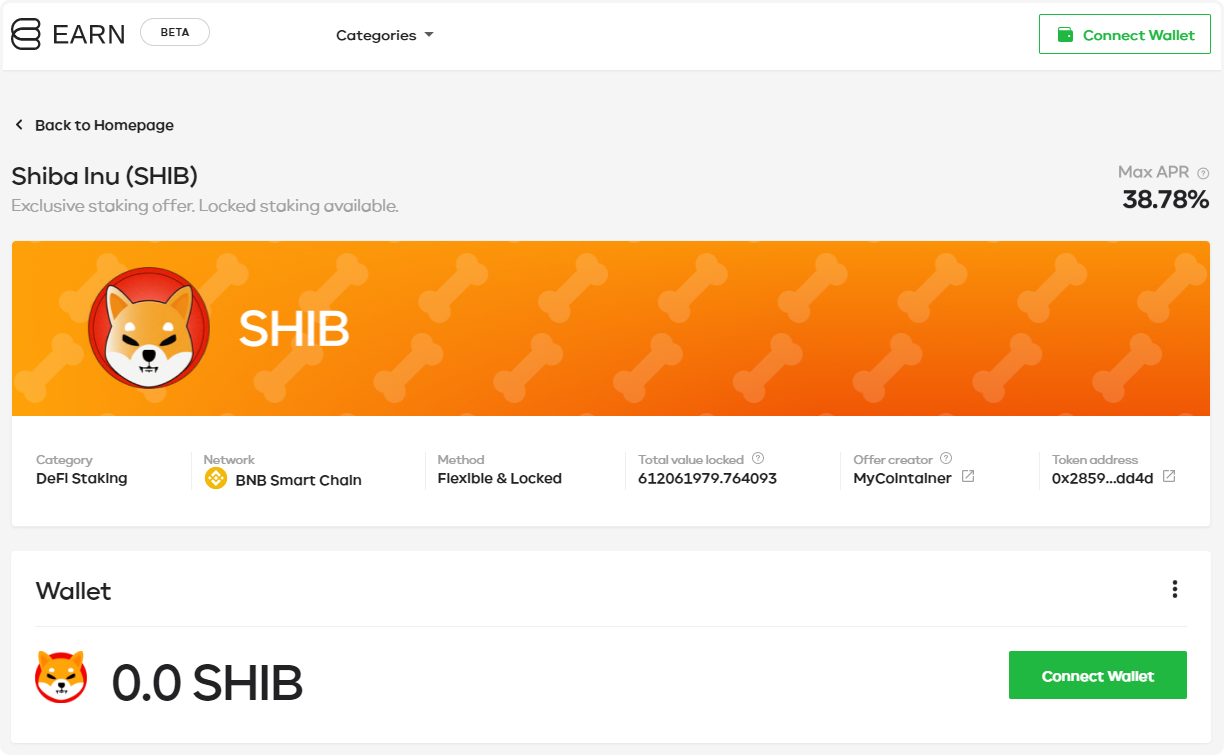
2. Click “Connect wallet” - the MetaMask modal will appear. Right after connecting you’ll be able to check your account balance together with funds that interact with our DeFi Staking pools.
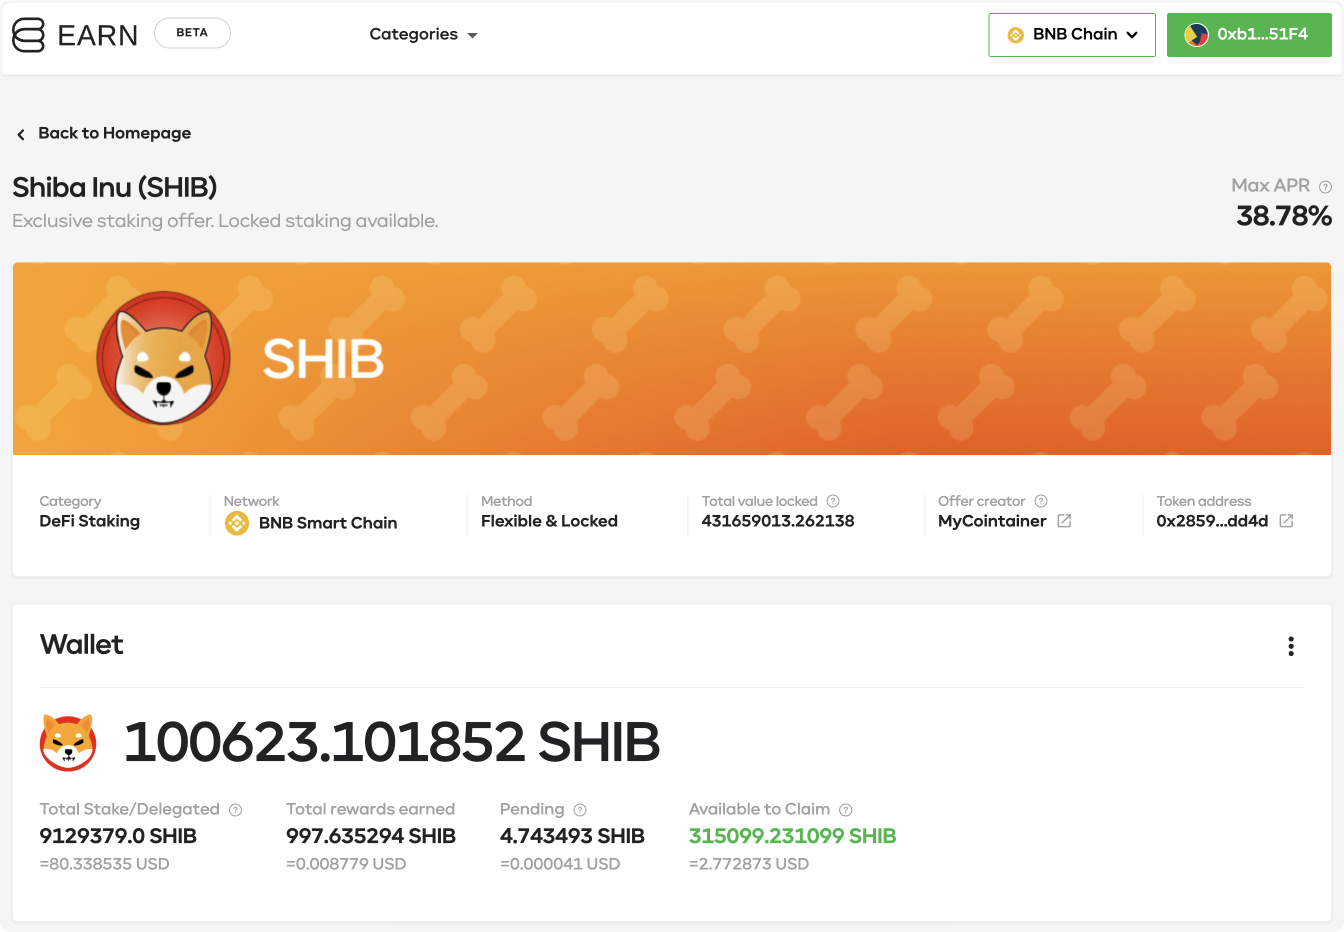
NOTE: The first wallet supported by our platform is MetaMask. Make sure you have your funds there (SHIB, and BNB for fees) on the appropriate network supported by our pools.
3. Select the offer of your interest and click the “Stake” button close to it.
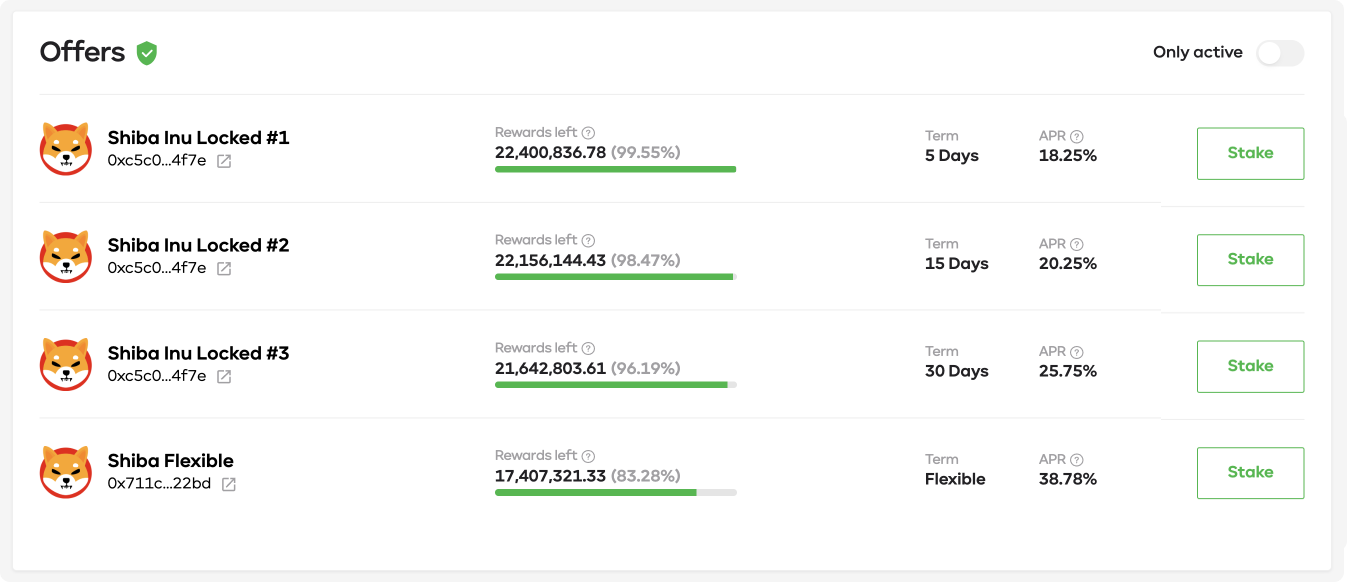
NOTE: Earn Network supports Locked & Flexible Staking pools for SHIB. Differences between them can be checked in our Whitepaper.
4. After clicking “Stake” a window will pop up. The next step is to input the number of tokens you wish to stake. Now you need to click “Approve SHIB” as a first transaction, set the spending amount, and then confirm it with your MetaMask wallet.
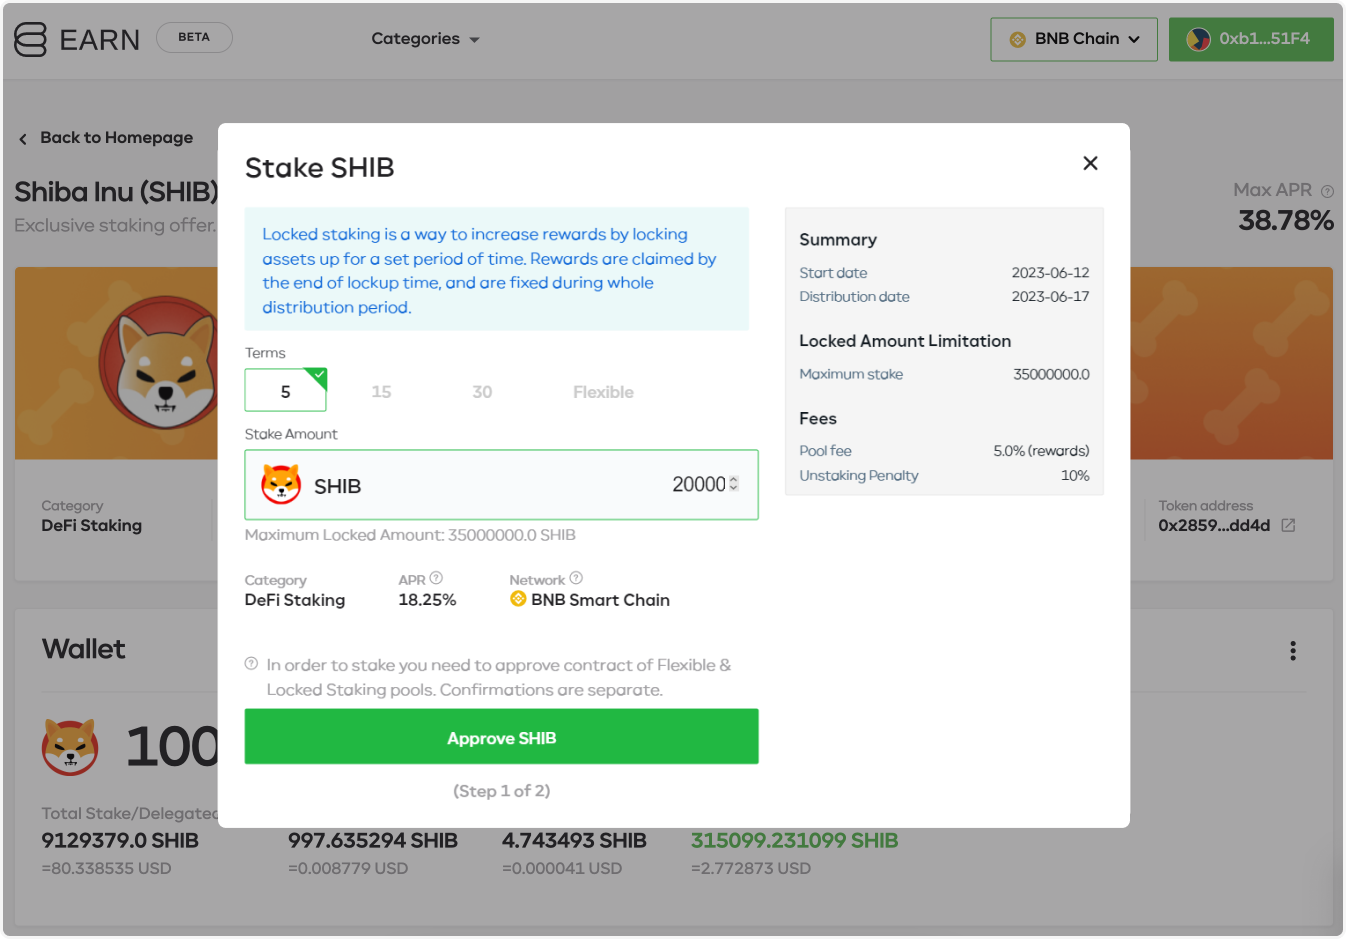
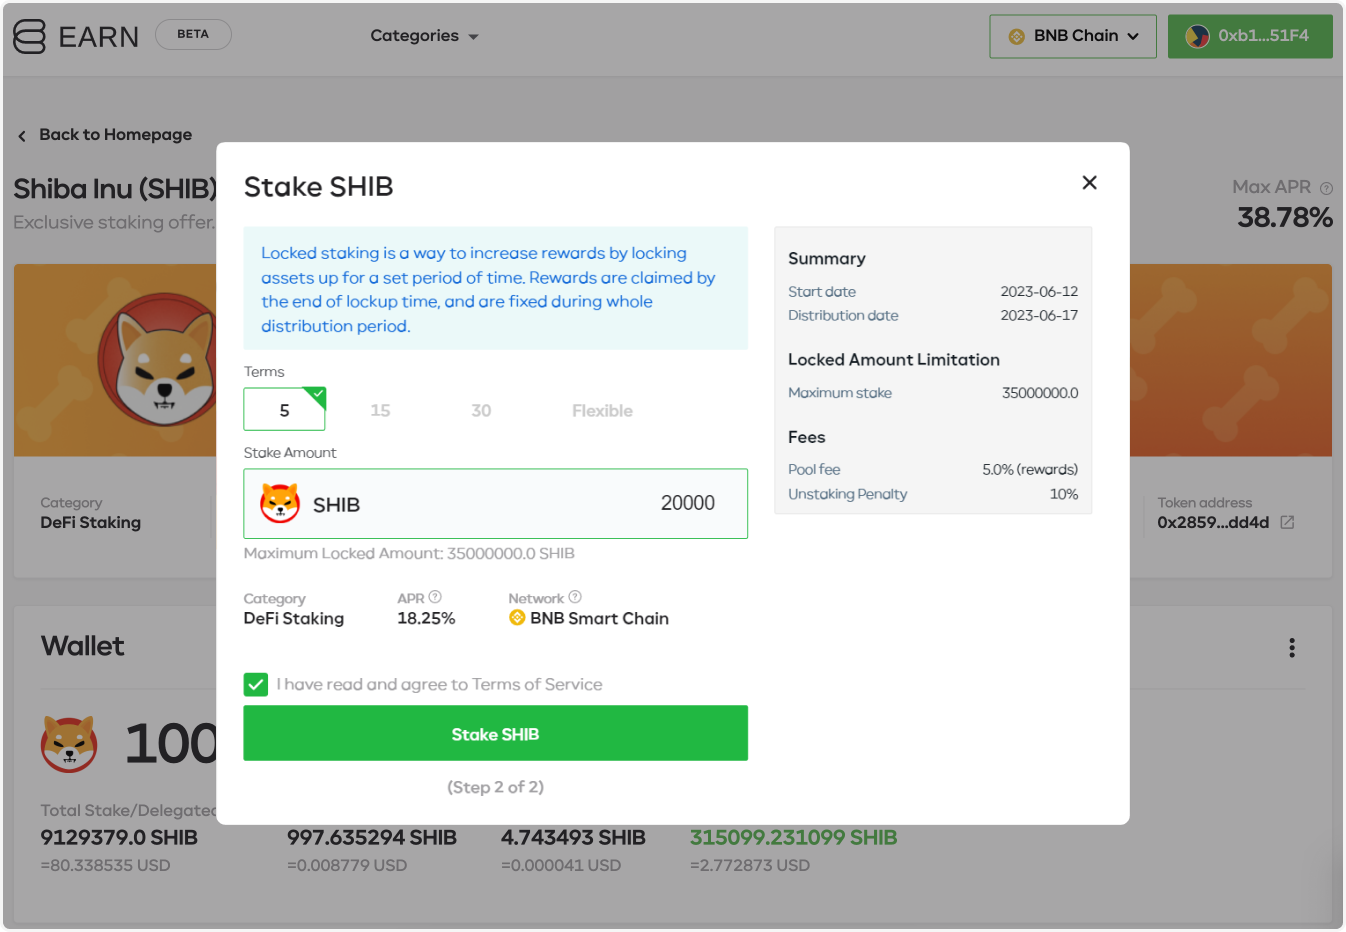
5. After the approval transaction is completed, click on the “Stake” button and confirm it again with your MetaMask wallet.
6. Congratulations! You have successfully staked your SHIB tokens.
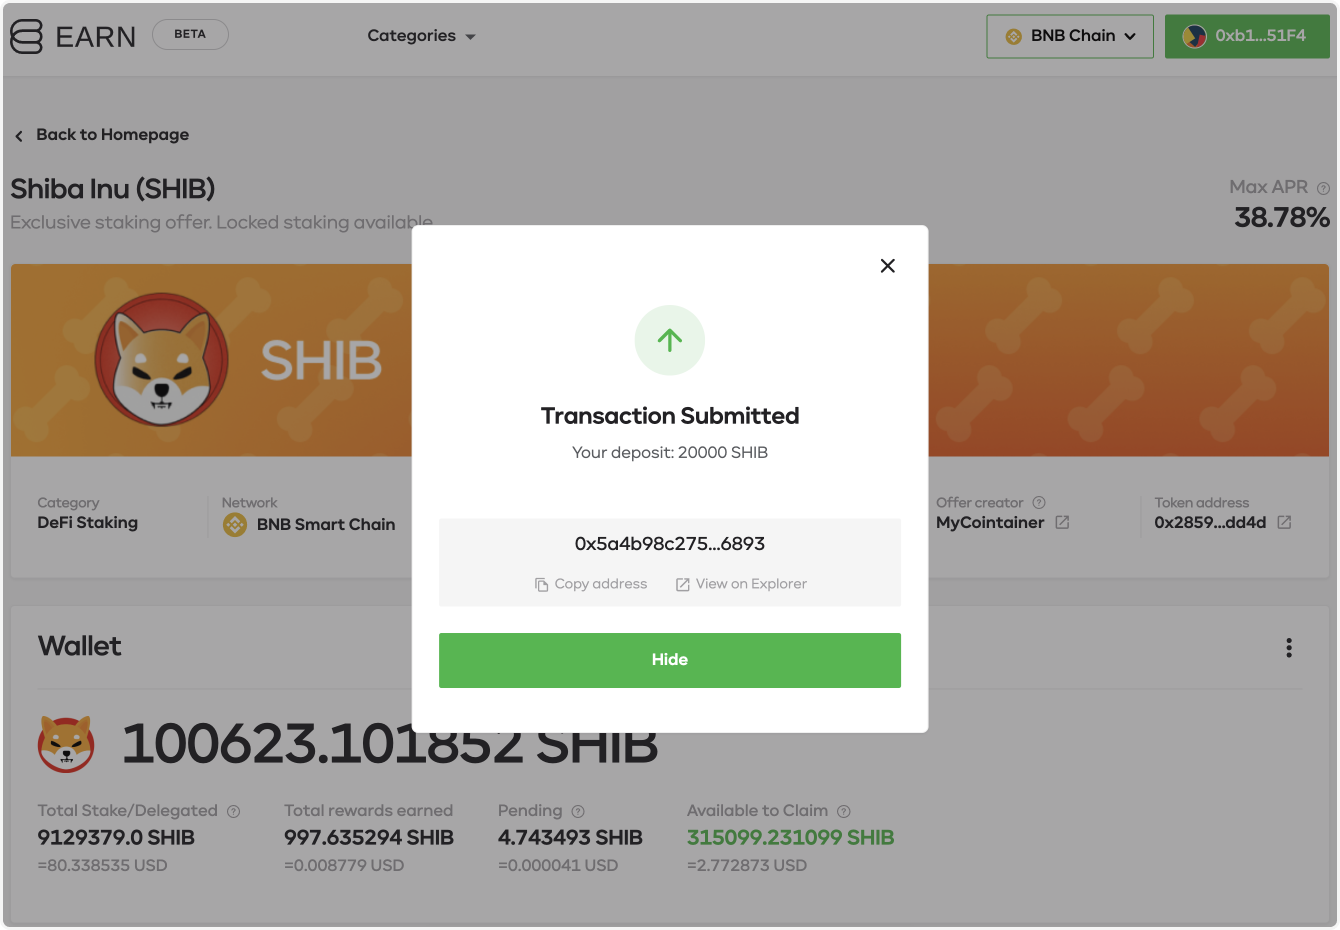
NOTE: You can always check the summary of your staked funds together with pending and available to claim rewards at the Wallet component.


