DeFi Staking: Launch of Onyx (XCN) pools
Experience seamless earning with Onyx (XCN) staking pools on Earn Network. Get started quickly with our user-friendly step-by-step guide.
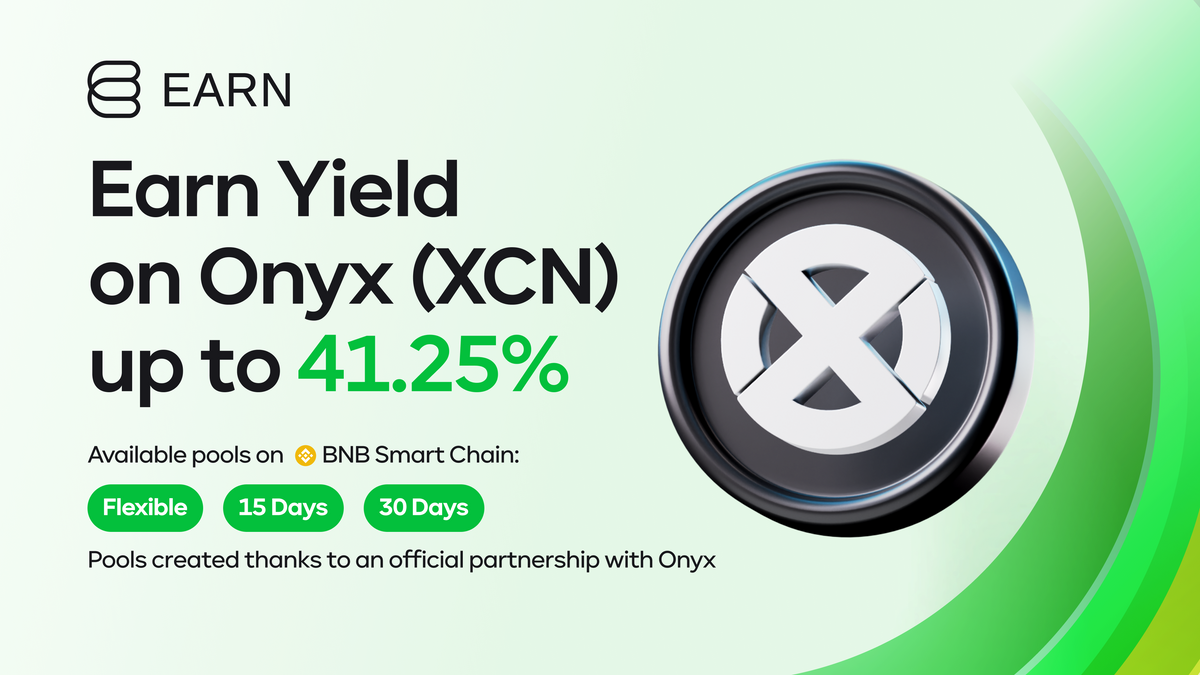
Due to the latest collaboration of Earn Network and Onyx, we're pleased to announce the launch of Onyx (XCN) DeFi Staking pools. Choose between locked and flexible options based on your unique investment preferences.
 Earn Network
Now you can confidently stake your funds and take your investment journey to new heights by following our comprehensive, step-by-step decentralized staking guide specifically designed for XCN tokens at the BNB Smart Chain network.
How to start staking Onyx (XCN)?
We will walk you through the process of interactions with Onyx DeFi Staking pools so you can easily stake your tokens and earn yield in a decentralized manner.
1. Go to the Onyx Offers page.
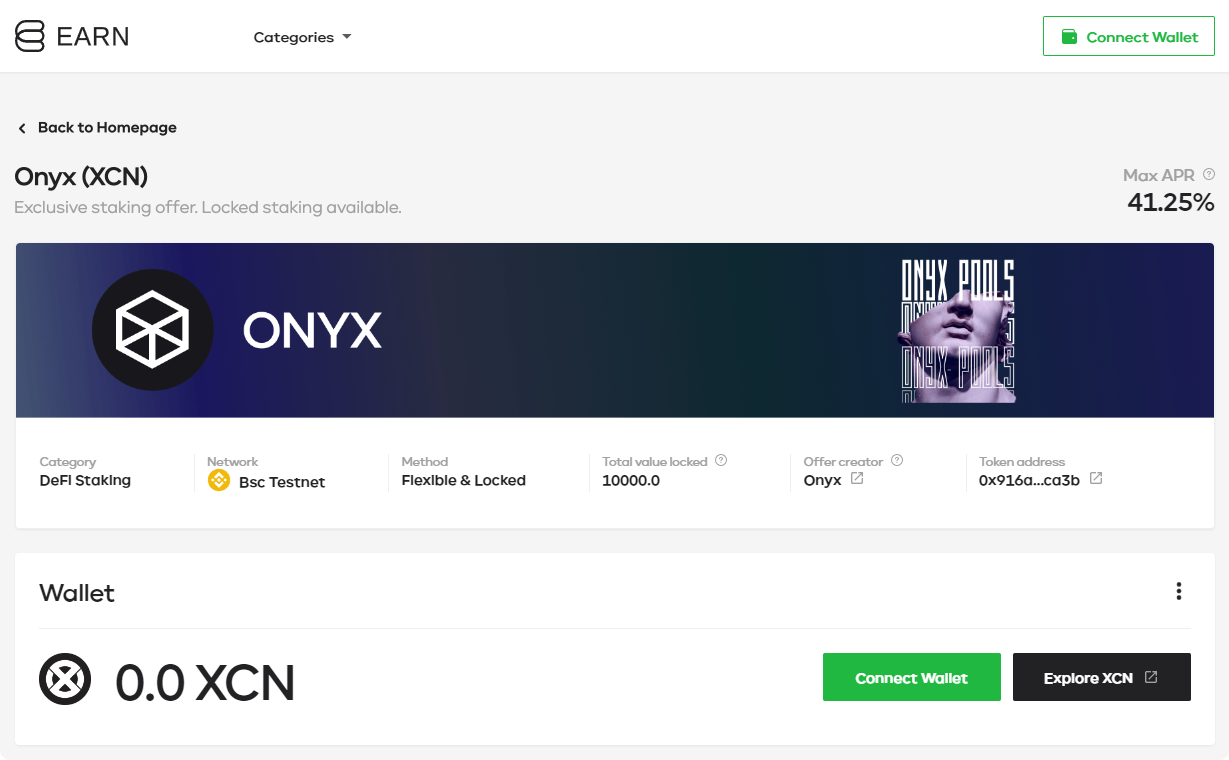
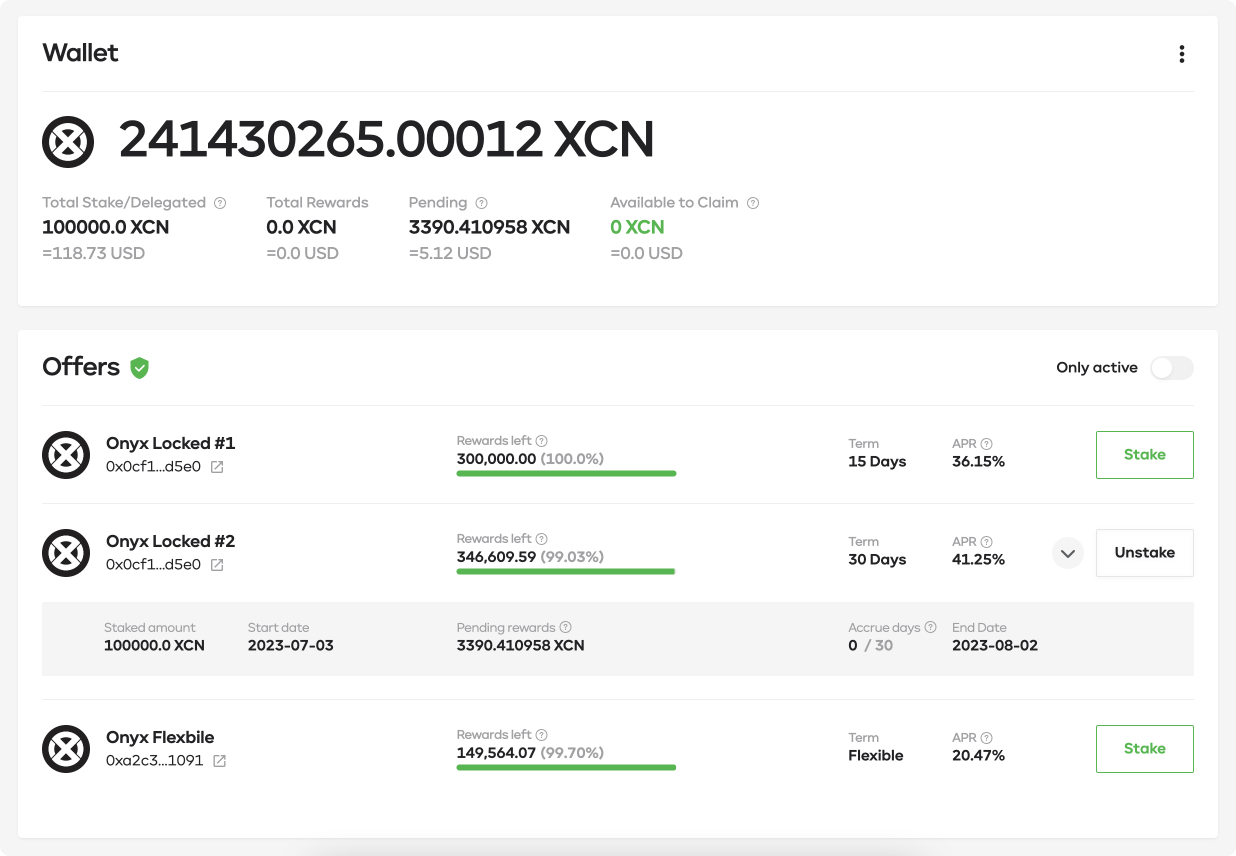
2. Click “Connect wallet” - the MetaMask modal will appear. Right after connecting you’ll be able to check your account balance together with funds that interact with our DeFi Staking pools.
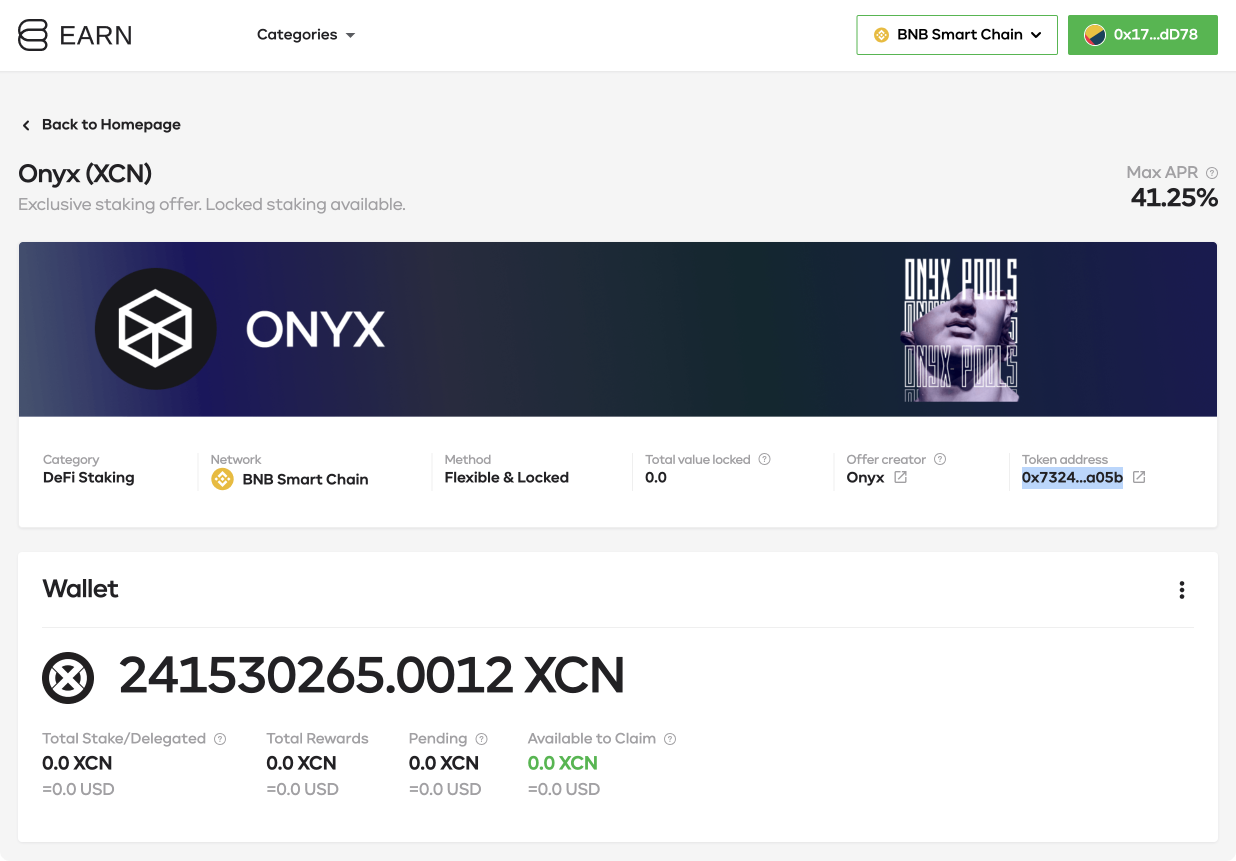
NOTE: The first wallet supported by our platform is MetaMask. Ensure your funds (XCN, and BNB for fees) are on the BNB Smart Chain network supported by our pools. Learn how to bridge XCN to the BSC network.
3. Select the offer of your interest and click the “Stake” button close to it.
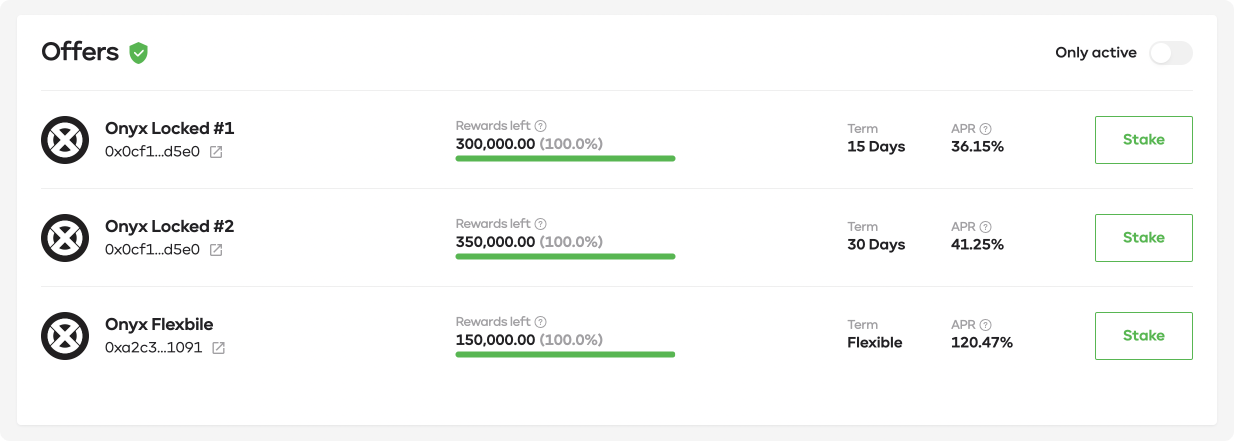
NOTE: Earn Network supports Locked & Flexible Staking pools for XCN. Differences between them can be checked in our Whitepaper.
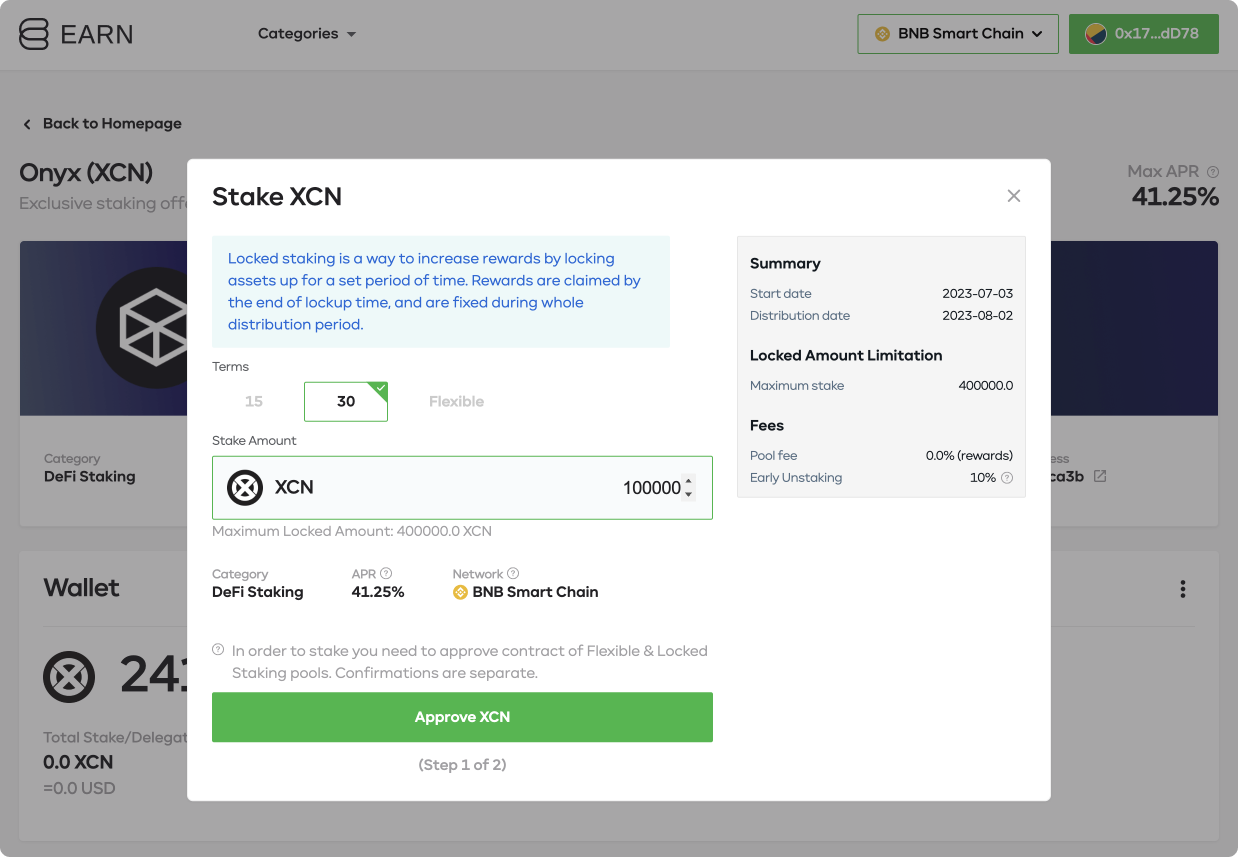
4. After clicking “Stake” a window will pop up. The next step is to input the number of tokens you wish to stake. Now you need to click “Approve XCN” as a first transaction, set the spending amount, and then confirm it with your MetaMask wallet.
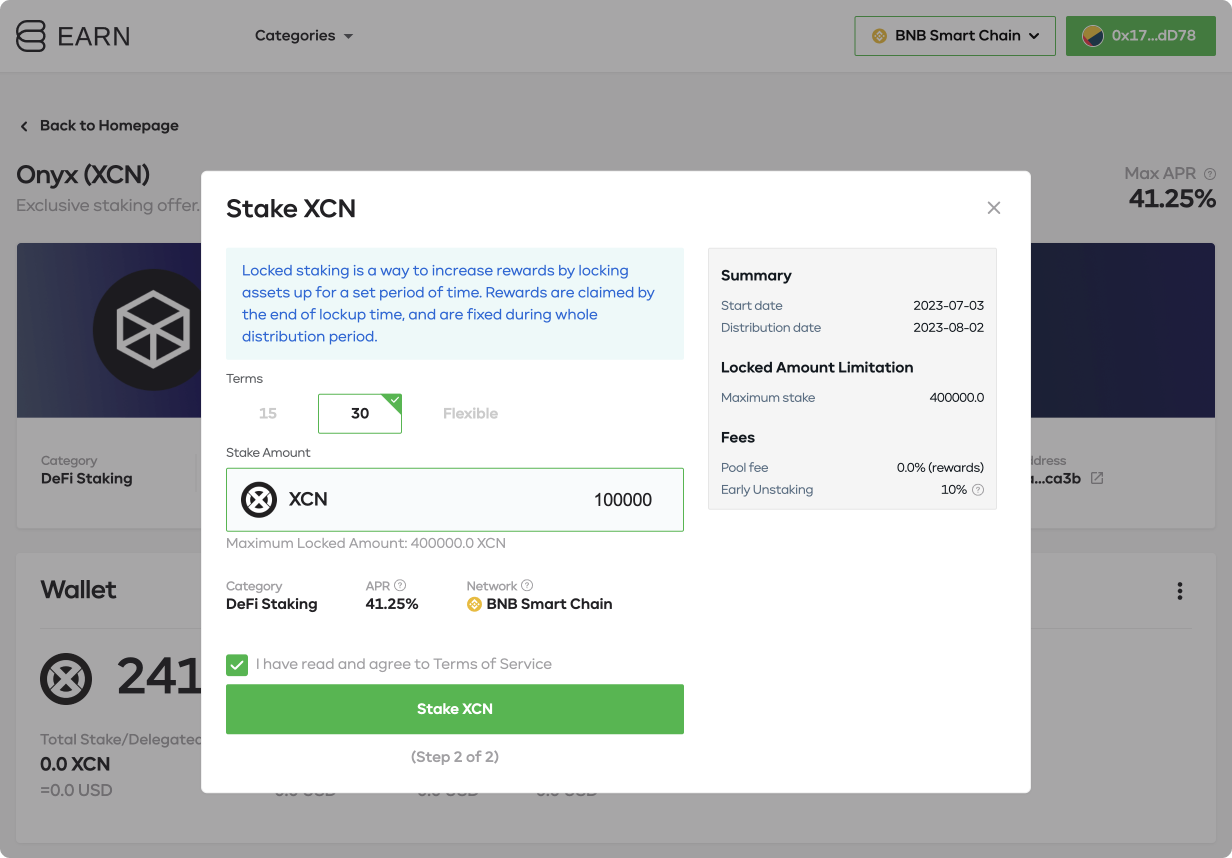
5. After the approval transaction is completed, click on the “Stake” button and confirm it again with your MetaMask wallet.
6. Congratulations! You have successfully staked your XCN tokens.
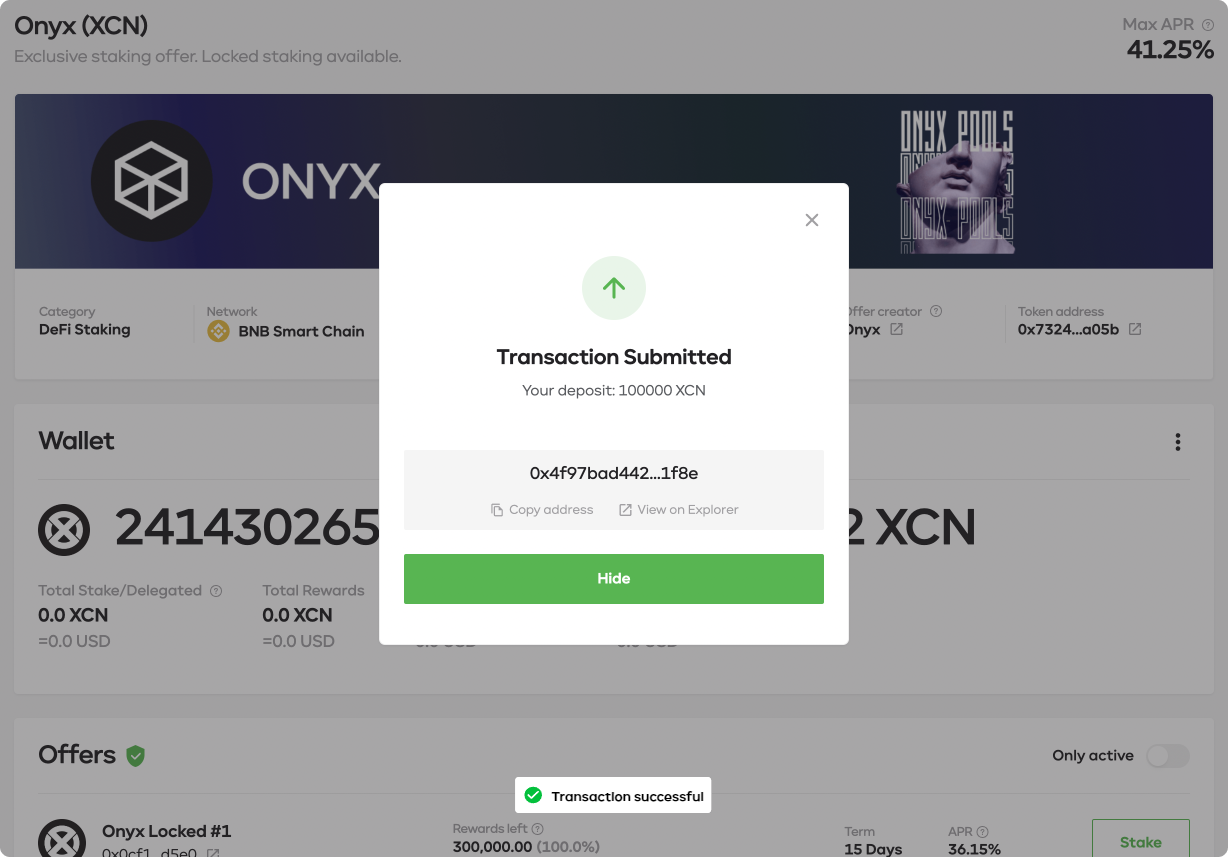
NOTE: You can always check the summary of your staked funds together with pending and available to claim rewards at the Wallet component.